

In today’s fast-paced business environment, seamless communication and efficient data access are crucial. By integrating Dynamics 365 Business Central with Microsoft Teams, you can bring your business data directly into your team’s collaborative workspace. This integration allows you to:
- Access Business Central Data in Teams: View and share customer, vendor, and transaction details without leaving Teams. This ensures that your team has the most up-to-date information at their fingertips.
- Collaborate on Business Records: Share Business Central records in Teams chats and channels. This feature enables your team to discuss and make decisions based on real-time data.
- Streamline Workflows: Use Teams to initiate and manage workflows that involve Business Central data. This can help automate routine tasks and improve overall efficiency.
- Enhance Communication: With Business Central data available in Teams, your team can communicate more effectively, reducing the need for back-and-forth emails and meetings.
Integrating Dynamics 365 Business Central with Microsoft Teams can significantly enhance your team’s collaboration and productivity. By integrating these powerful tools, you can create a more connected and efficient work environment, helping your team stay focused and productive. This document will help you to work through process of integration between Microsoft Teams and Dynamics 365 Business Central.
To begin integrating Business Central with Microsoft Teams, follow these steps:
- Install the Business Central App in Teams: Go to the Teams app store, search for the Business Central app, and install it.
- Sign In and Connect: Open the Business Central app in Teams and sign in with your Business Central credentials. Follow the prompts to connect your Business Central account.
- Explore Features: Once connected, explore the various features available, such as looking up contacts, sharing records, and adding Business Central tabs to your Teams channels.
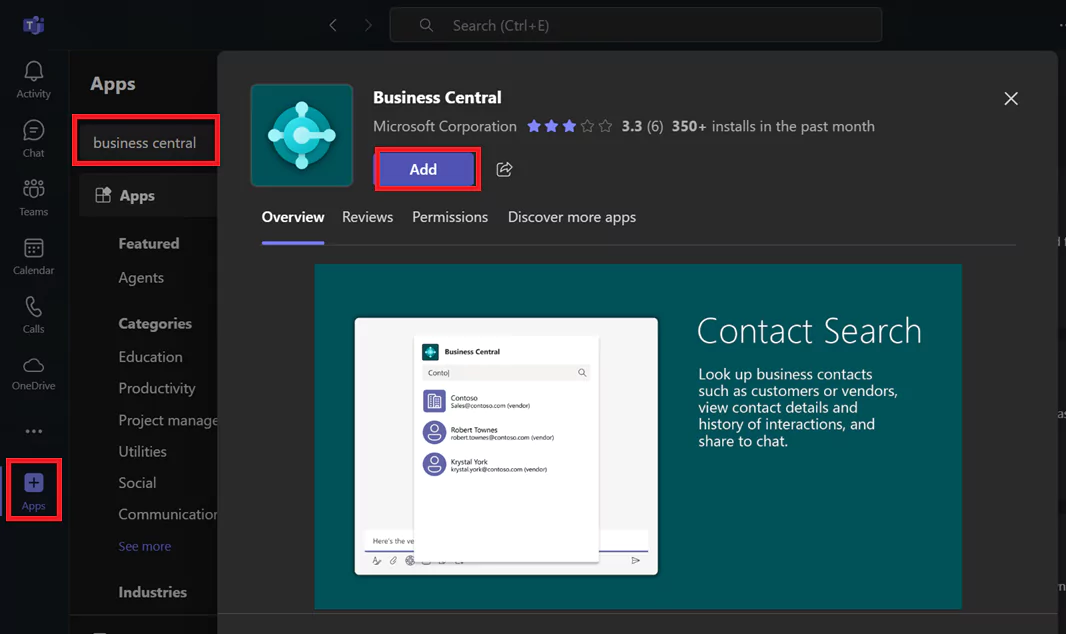
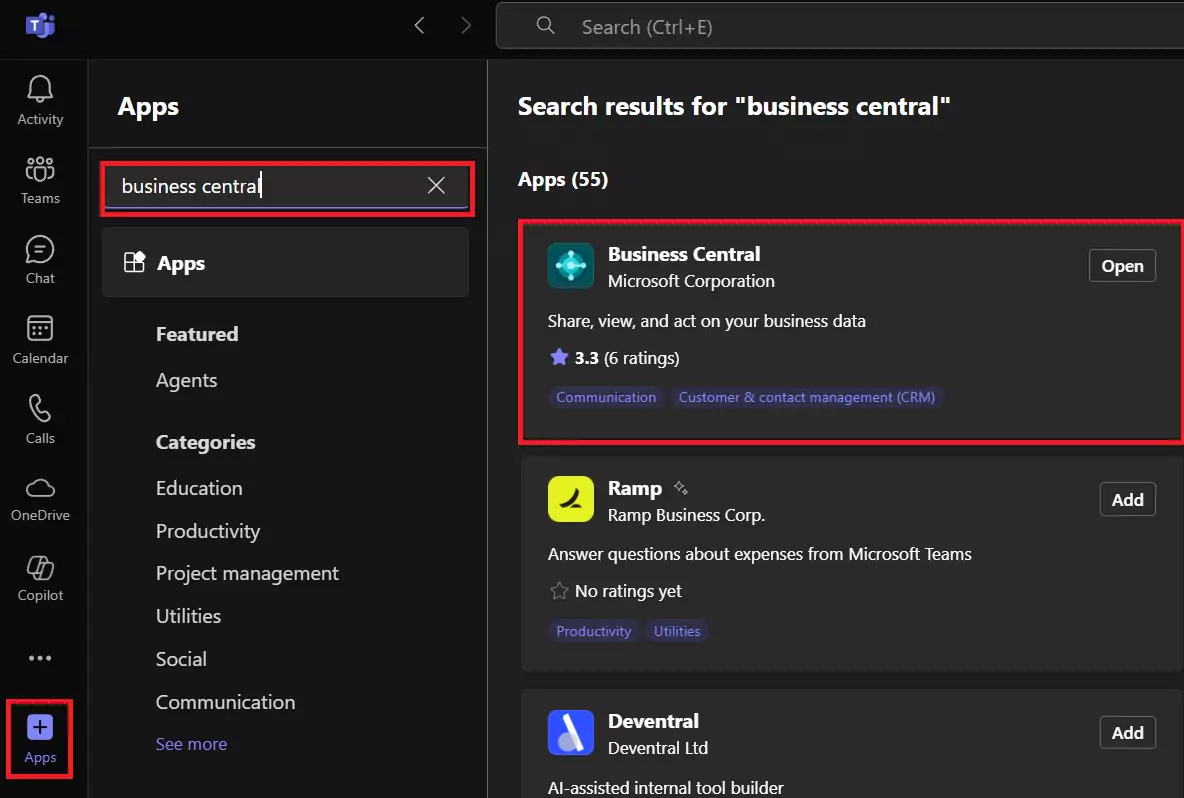
Microsoft Teams Integration with Business Central
1. Look Up Contacts: You can look up details about customers, vendors, and other contacts directly from Teams. This includes general information, interaction history, and related documents.
2. Share Records: Copy a link to any Business Central record and paste it into a Teams conversation. The link will expand into an interactive card displaying information about the record
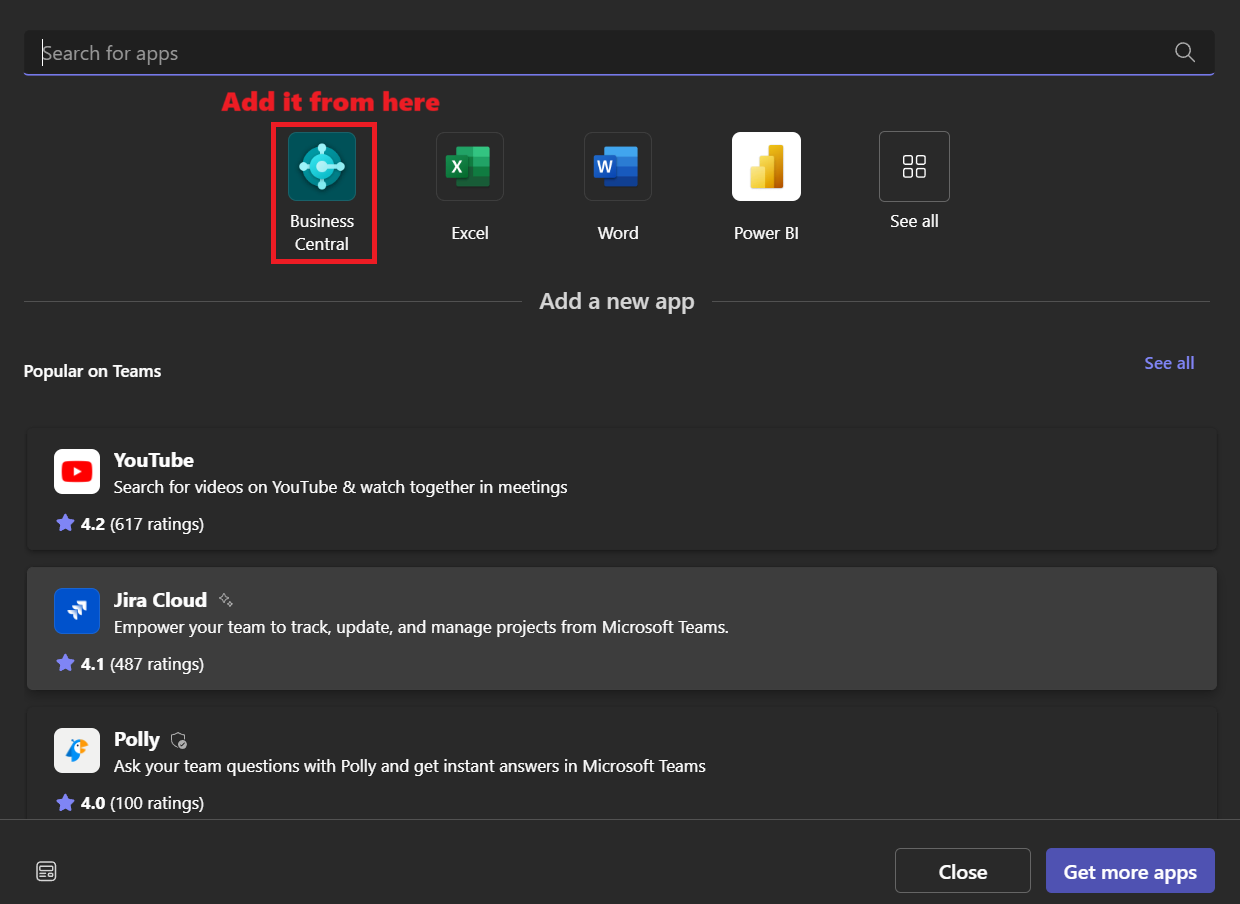
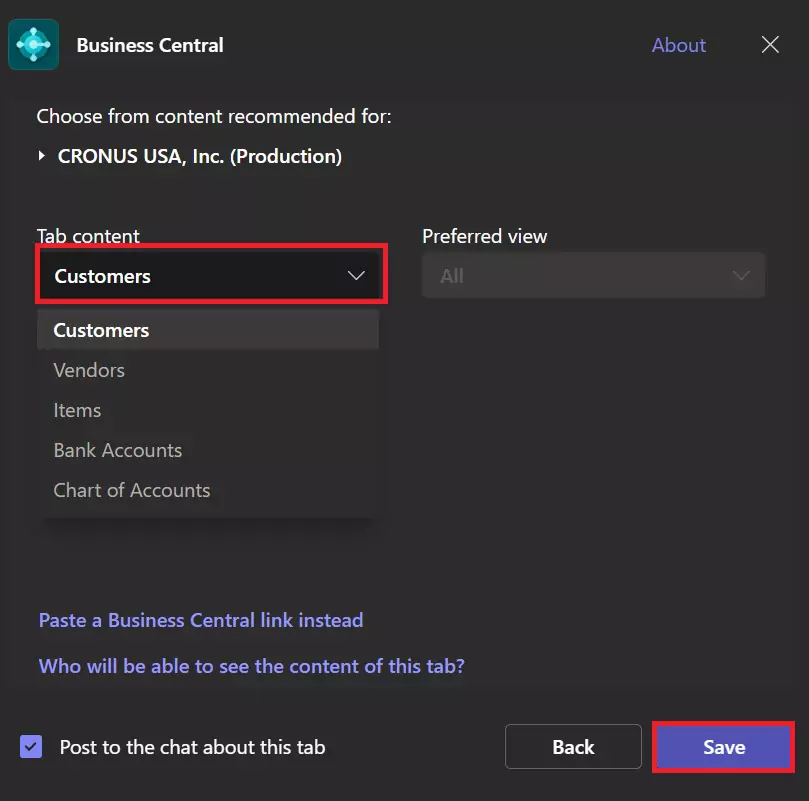
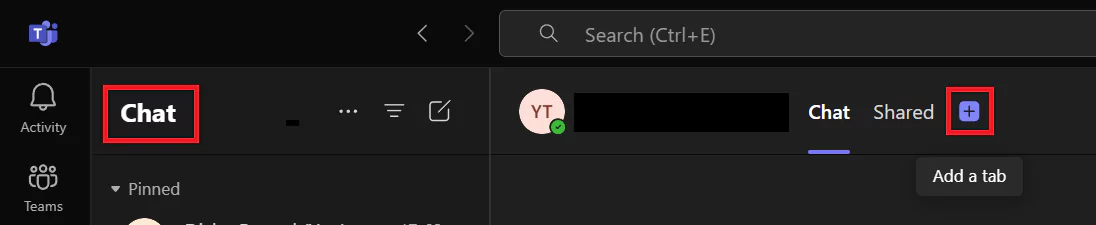
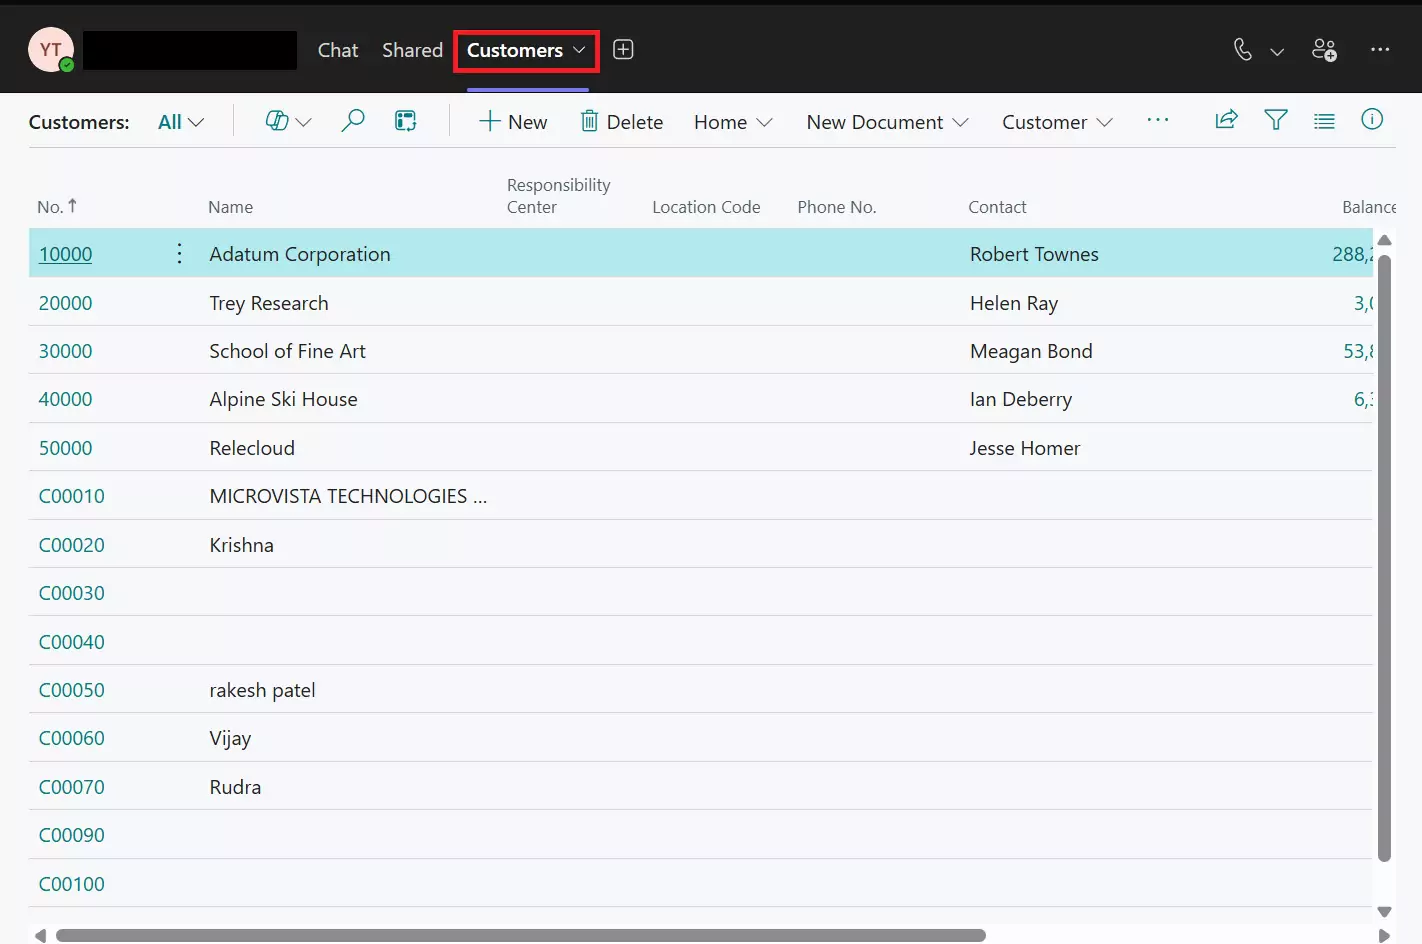
3. Add Tabs: You can add a Business Central tab in a Teams channel or chat to show data from lists and card pages.
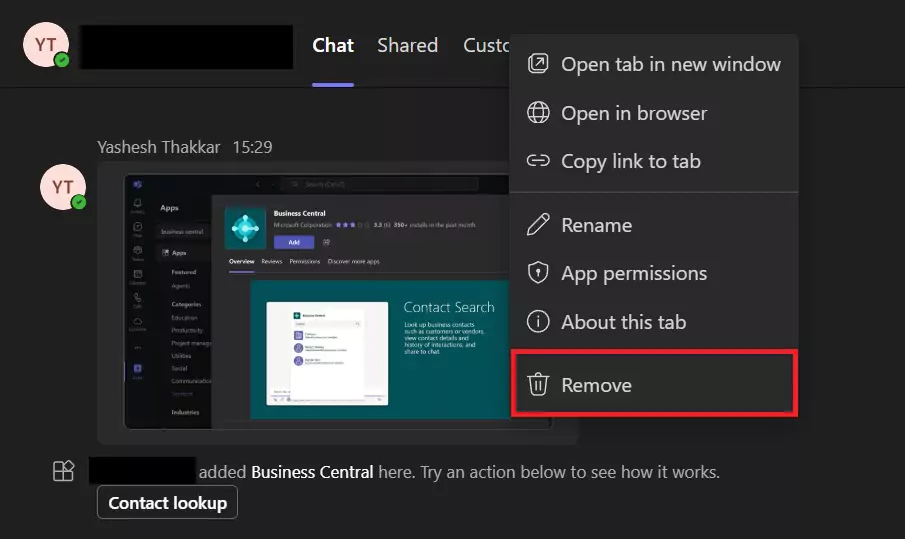
4. You can also remove the tab.
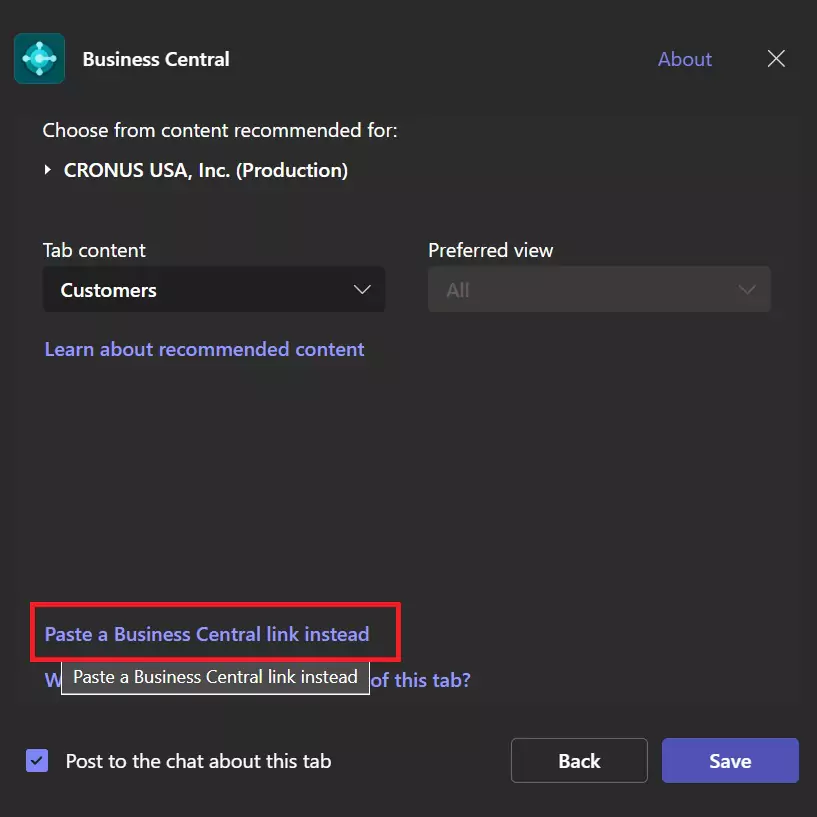
5. Only link can also be added and particular card page can be shared.
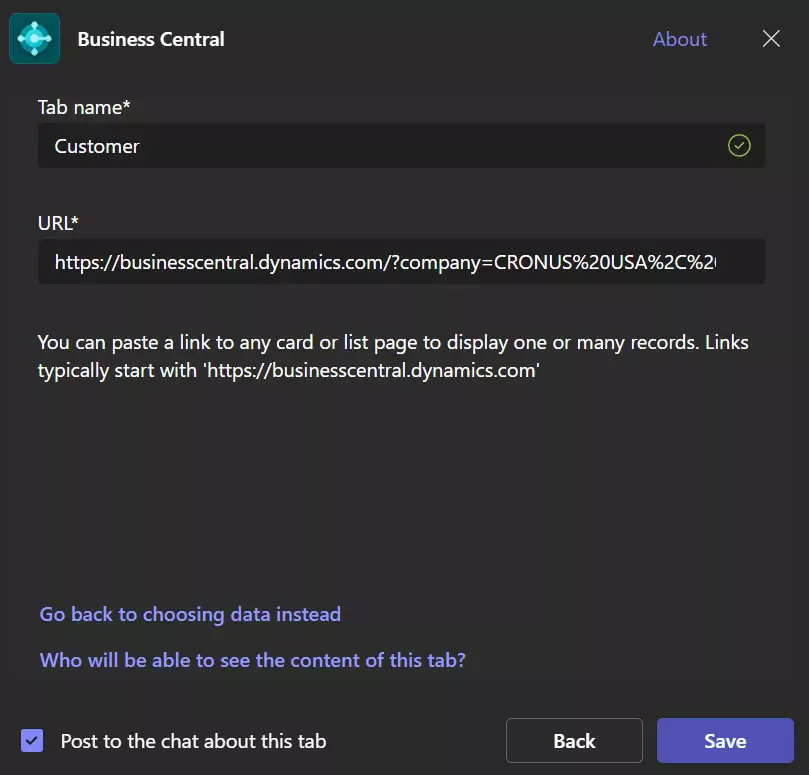
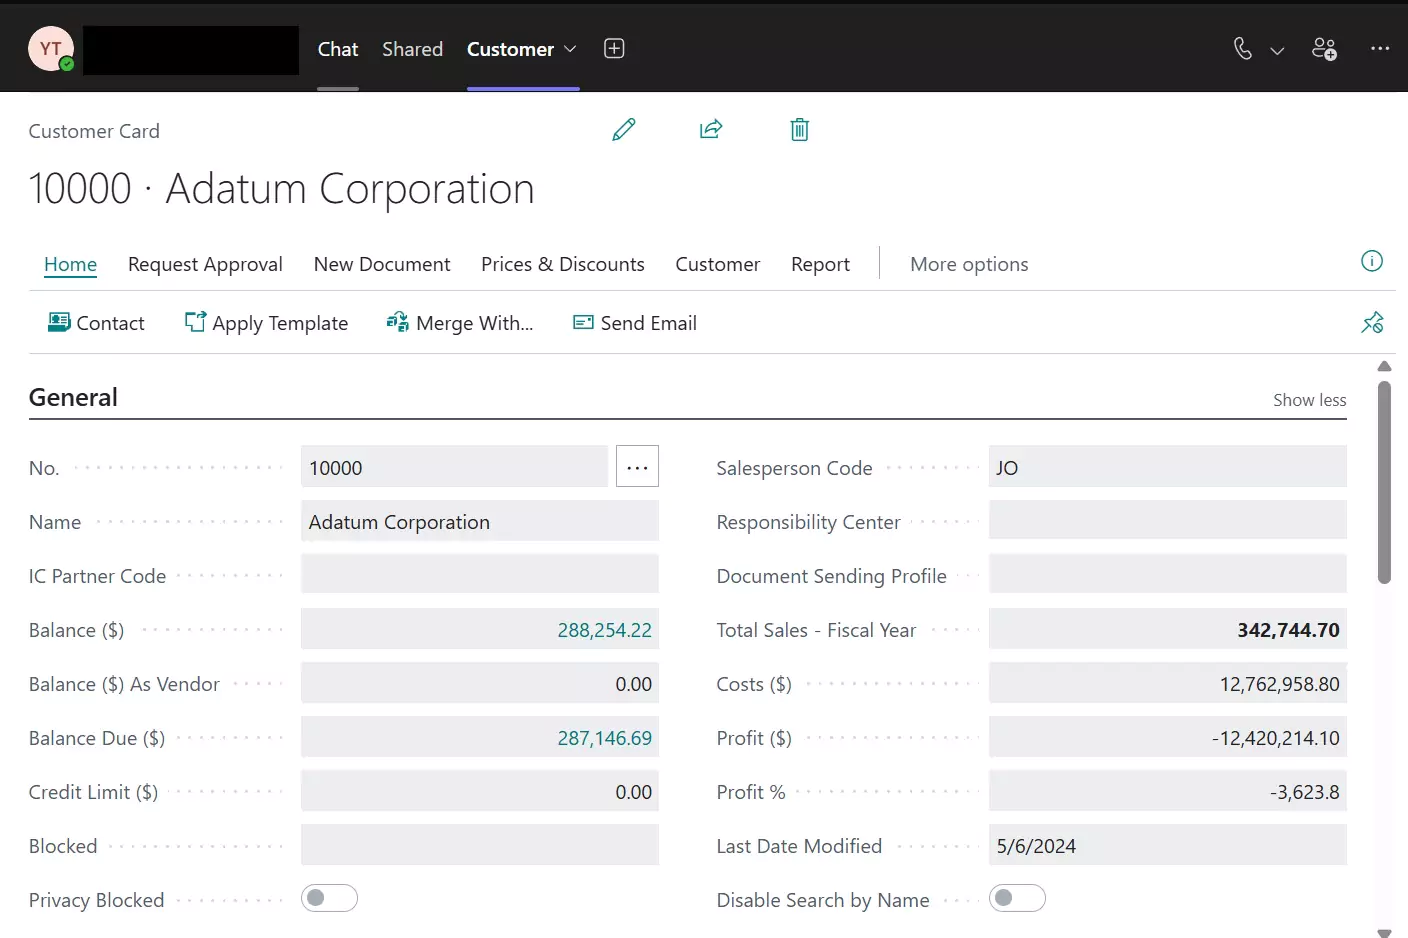
Minimum requirements in Microsoft Teams
This section describes the minimum requirements for the Business Central app features to work in Teams.
Required licenses
The Business Central app requires a Teams license through a Microsoft 365 Business or Enterprise plan, Microsoft Teams EEA, or a similar plan that includes Microsoft Teams.
Allow URL previews
Allow URL previews policy setting must be turned on. Otherwise, a card can’t be generated for Business Central links pasted into a Teams conversation. Learn more about this setting in Manage messaging policies in Teams.
Minimum requirements In Business Central
Business Central version:
Teams integration is only supported for Business Central online, not on-premises.
Codeunit 2718 Page Summary Provider is published as a web service:
This codeunit is published as a web service by default. The codeunit is part of the Business Central system application. It’s used to get the field data for a Business Central page added to a Teams conversation. Learn more about publishing web services in Publish a Web Service.
User permissions:
For the most part, the contact search, pages, and data that users can view and edit in a Teams conversation is controlled by their permissions in Business Central.
- To search for contacts, users must have at least read permission to the Contacts table.
- To paste a Business Central link into a Teams conversation and have it expand into a card, users must have at least read permission on the page and its data.
- Once a card is submitted into a conversation, any user in that conversation can view that card without permission to Business Central.
- To view more details for a card or open the record in Business Central, users must have read permission on the page and its data.
- To change data, user’s need modify permissions.
Installing the Business Central app by using Centralized Deployment
The Microsoft Teams admin center is where you configure Teams app setup policies for the organization. In the Teams admin center, you can use the Centralized Deployment feature to automatically install the Business Central app in Teams for all users in your organization, specific groups, or individual users.
(Note: To set up Centralized Deployment, your Teams account must have at least the Teams Administrator role.)
- In Business Central, choose the icon, enter Teams App Centralized Deployment, and then choose the related link. Or select here to open the page directly.
- Read the information on the Set up the Business Central app for Teams, then choose Next when ready.
- Open the Teams admin center, and complete the following steps.
- Go to Teams apps > Setup policies.
- Create a new policy or select the policy that you want to use to install the Business Central app, then select Add apps.
- In the Add installed apps page, search for and select Business Central.
- Choose Add.
- Business Central should now appear under Installed apps for the policy.
- Configure more settings as needed, then choose Save.
Learn more in Manage app setup policies in Microsoft Teams in the Teams documentation.
- Go back to Teams App Centralized Deployment in Business Central and select Done.
Important: It can take up to 24 hours for the app setup policy to be applied and the app deployed to users.
Managing privacy and compliance
Microsoft Teams provides extensive controls for compliance and management of sensitive or personally identifiable data—including data added to chats and channels by the Business Central app.
Understanding where Business Central cards are stored
After a card is sent to a chat, the card and the fields shown on the card are copied to Teams. This information is subject to the Teams policies for your organization, such as data retention policies. When displaying card details, none of the data in the details window is stored in Teams. The data remains stored in Business Central and will only be retrieved by Teams when the user chooses to view the details.
- Learn more about where Teams stores that data at Location of data in Microsoft Teams.
- Learn more about retention policies in Teams at Retention policies in Microsoft Teams.
Restricting sharing of cards
You prevent specific users or groups from sending cards to chats or channels by setting up messaging policies that turn off the URL Previews setting. For more information about this setting, see Manage messaging policies in Teams.
You can also use information barriers to prevent individuals or groups from communicating with each other. To learn more, see Information barriers in Microsoft Teams.
Data loss prevention features in the Microsoft Purview can’t be applied specifically to cards. But they can be applied to the chat messages that contain the cards.
Responding to data requests
You allow team members and team owners to delete messages that contain sensitive cards by setting up messaging policies, like: Owners can delete sent messages and Users can delete sent messages. Learn more at Manage messaging policies in Teams.
Content search and eDiscovery compliance features in the Microsoft Purview can also be applied to cards.
Because card data in Teams is a copy of data in Business Central, you can also use Business Central features to export a customer’s data if requested. Learn more about privacy in Business Central in Privacy FAQ for Business Central Customers.
Show or hide record data on cards
When a record is shared with others in a Teams chat or channel, a card with fields that contain data about the record is shown. All recipients can view this data (or record summary) by default, regardless of their license or permissions in Business Central. If you’re an admin, you can use the Card Settings assisted setup guide to hide the record summary from appearing on cards in Teams. Hiding the record summary removes all fields and images but continues to show the Details button and other non-record information on the card.
You configure the setting per environment. So, when you turn the record summary on or off, it affects all companies in the environment.
- In Business Central, open the environment that you want to change.
- Choose the icon, enter Card Settings, and then choose the related link.
- Read the information on the Card Settings, then choose Next when ready.
- On the Data Visibility page, turn on the Show record summary switch to display data on the cards or off to hide the data.
- Select Next and follow the instructions to complete the setup guide.

